How to draw a forest and a river with a pencil. How to draw a forest. Examples of drawing spruce
When a person first picks up a pencil to draw a forest, he is faced with a problem: how to draw a huge number of small details? As a child, I asked a similar question to my teacher: “How should I draw trees correctly - should I draw all the leaves or not?” To which he replied with a smile: “Of course not!” How then to draw a forest correctly?
1. Conveying space and perspective in a forest drawing.

When artists paint interiors or city streets, then everything is clear with perspective. Rectangular, simple geometric shapes easily “fit” into perspective reduction. Here it is easy to outline the horizon line and bring all sides of the buildings to the vanishing point. But how is space organized in the forest, where it is filled with all sorts of branches, snags, foliage... In the illustration, I specially drew a diagram of five planes, reminiscent of a room. This makes it easier for a beginning artist to imagine space. Further, against this background distribute trees. Trees have trunks and crowns where the shapes are far from simple geometric. They are “clumsy” because they have many bends and kinks, and also abound in such details as bark, small branches, etc. But, despite these “difficulties,” they also subordinate linear perspective, just like rectangles. The tree trunks in the foreground are larger, in the second they are smaller, etc. In addition, one tree covers another or one branch covers part of another branch. The trees in the foreground are so large that they do not fit into the sheet and extend beyond its frame. Thus, the viewer finds himself inside the forest, and is not an observer from the outside when the forest is built like a wall next to him.
In the illustrations I gave an example from my drawings, where the forest is drawn “from the outside” and “from the inside”. Therefore, you need to remember that different angles and points of view are possible. I.I. Shishkin loved to paint the forest, “placing” the viewer inside.
2. Generalization of small parts into masses of large, medium and small sizes.

In a forest drawing, of course, you can highlight individual leaves, focusing on the compositional center. I devoted a separate article to this issue, which you can read. However, more often the artist has to generalize. It is generalization that is always more difficult for beginners than drawing details. But it is necessary. So, what needs to be summarized and how? You need to generalize individual leaves and branches that form groups or masses. These groups should not be made the same size. Everything in nature is dynamic. Therefore, the drawing must be dynamic, and this is achieved through the transmission of rhythm. Rhythm is created when the artist does not create “sameness” in the drawing. Therefore, the masses of foliage will be different in size- large, medium, small. But the rhythm will be transmitted not only by size, but also degree of generalization. We greatly generalize some masses of branches and leaves, literally blurring the image. For example, it is appropriate in the background. But we can’t generalize some groups so much: in them you can discern a certain semblance of foliage that forms a “clumsy” texture. Well, individual groups in the foreground will, of course, contain details: carefully drawn leaves and branches. However, they will belong this group. But separately located trees, branches, leaves need to be detailed with care. If there are too many such objects in the drawing, they will look “glued” to the drawing and will not part a single whole, which will cause a “cartoonish” and unnatural effect.
3. Volume in natural forms.

It is, of course, easier to convey the volume of a cylinder or ball when we draw a still life. But in the forest, there are no such forms. At first sight. But if you look closely, then in basis the shape of the tree trunks remains the same cylinder. IN basis intricately shaped groups of foliage - ball. IN basis paths in the forest - tetrahedral corridor shape. And so on. Understanding It is easier for an artist to generalize natural forms and convey volume. Chiaroscuro can be seen on tree trunks, on masses of foliage and individual leaves, on the entire crown of a tree, and even on a whole group of many trees. As an example, I illustrated chiaroscuro on a tree trunk. Although its shape is based on a cylinder, it still has irregularities and bends. In addition, the trunk is covered with bark, which has its own characteristics for each tree species. Therefore, the shading will not be smooth, but more textured. Here, each artist has his own shading techniques, so let’s not philosophize beyond what is necessary and create unnecessary templates. As for chiaroscuro in general, it is built from light, penumbra, shadow, reflex and falling shadow. It’s easier to understand this on a jug or in a still life drawing. How can you see such subtleties in the mass of foliage? Observation is important here. No wonder I.I. Shishkin is called a naturalist. He studied nature in detail, memorized varieties of grasses and trees. Therefore, watching the forest, you can see all the nuances of chiaroscuro in foliage, branches, etc. In academic drawing, this is called light-and-shadow modeling of form. Namely, modeling. That is, here you need to model, not copy, but understand the essence by observing nature.
In drawing a forest, of course, there are other issues that cannot be covered in one article. But the three aspects I've listed here are key. That's why I called them the keys to success. Keeping them in mind, you can learn to draw a forest professionally and competently.
Trees may seem like some of the easiest subjects to draw. If you have never drawn, the task may be too simple...

...or too literal:

In none of the drawings do we see anything similar to real objects. The first is just a symbol of a tree, and the second suggests the definition of a tree. Your job as an artist is to paint what we see, not what we know. Drawing trees– a great exercise for developing this skill!
In this lesson I will show you, how to draw oak, pine and weeping willow trees in a simple and realistic way.
What you will need:
- Several sheets of paper;
— Hard pencil (HB);
— Pencil of medium softness (2B);
— Soft pencil (5B or less);
- Sharpener.
Usually a pair of hard pencils (HB) is enough, but this set is not universal for all drawings. To get dark shadows, we need soft pencils. There is no need to choose expensive ones - I bought the most common ones, and they perform their function perfectly. If you doubt whether you need to draw, then a set of pencils of different degrees of hardness will not be a big loss on your budget, and drawing with these is much easier!
You will also need a sharpener. A dull tip leaves lighter strokes and does not achieve the expected effect. Always keep your pencils sharp and remember that soft pencils wear out faster!
Regarding paper: it can be anything. Regular printer paper will also work. However, you should not draw on a whole sheet of paper - the smaller the drawing, the less detail you will need to add. In reality, my drawings are about 9 cm in height.

Soft pencils help make shadows darker, which cannot be said about hard pencils. Hard pencils are not as dark, even if you press hard on them!
- DRAWING AN OAK
Step 1
The brain works in an unusual way: it first grasps the big picture and then pays attention to the details. Therefore, you should not start drawing with details - you will need to create a base first.
Draw the general shape of the tree with a few faint strokes and dots. To do this, use a hard (HB) pencil, do not press on it. These strokes will not be part of the finished image - they will not be visible in the finished drawing; The camera and scanner don't recognize them (I used Photoshop so you can see them!).

Step 2
Draw the trunk. Don't forget - the lower part should expand downwards. The larger the tree, the shorter and thicker its trunk.

Step 3
Draw the branches at the top of the trunk.


Continue drawing the branches, gradually lowering the line as they lengthen.

Step 4
Add other branches to each branch (the longer, the lower they go). The strokes should be light.

Step 5
Using short, sharp strokes, draw the shape of the tree's crown. It doesn't have to be smooth and neat.

Step 6
Using the same method, draw small “clouds” of leaves inside the crown. Leave some areas empty so that parts of the branches are visible - this structure looks more interesting.

Step 7
Add thickness to the branches in places where they are not covered by leaves.

Step 8
Before you start applying shadows, determine which parts of the tree will be bright and which parts will have shadows. You can identify them by simple shading.

Step 9
Take a soft (2B) pencil (make sure it's sharp) and create texture on the trunk. Remember to also leave white areas - this is important for texture.

Step 10
Take soft pencils (2B and 5B) and darken the barrel according to the original light distribution plan. Don't be afraid to press down on the soft pencil to get the shadow you want, but don't overdo it either! The fewer black areas in the picture, the more impressive it looks.

Step 11
Take a hard pencil and sketch out the outlines of the leaves. Draw them in relaxed circles, quickly, with sharp movements.

Step 12
Each branch also has its own small crown (these are the “clouds” that you drew). They need to be shaded in the same way as if they were separate trees.
First, use a soft (2B) pencil to draw darker circles on the dark side. Don't press too hard at first so you can correct any mistakes.

Once you're sure you've got the dark sides right, add shadows and depth to them, and add some transition between the light and dark parts.

Step 13
Use a soft (2B) pencil to add some stray leaves throughout the crown and "little crowns." This will create the effect of additional, barely visible branches.

Step 14
Take the softest pencil and add some dark accents in the darkest places. The crown will be more contrasting. Also make sure that all leaves are darker than the “sky” background - leaves cannot be transparent! You can go over the lightest areas again with a hard pencil.

- DRAWING A PINE TREE
Step 1
Again, we start drawing with the general outline of the tree. Take a hard pencil and draw light lines.

Step 2
Draw the branches. Don't try to get them exactly right, just sketch them out.

Step 3
As with the oak tree, draw “clouds” on the branches. This time they should be narrower and even more uneven. Leave plenty of free space between them.

Step 4
Draw the outline of the trunk - long and narrow.

Step 5
Use a soft (2B) pencil to darken the barrel...

...and then a softer pencil to highlight the darkest side.

Step 6
This time there is no need to fill in the “clouds” with circles; fill them instead with sharp and chaotic strokes.

Step 7
Use a soft (2B) pencil to draw needles along the outline of the clouds. They should be thin and sharp.

Step 8
Draw the branches and darken them with two soft pencils.

Step 9
Draw even more needles inside the “clouds” with a soft (2B) pencil).

Step 10
Use the softest pencil to darken the clouds. If you want, you can simply darken them completely - evergreen trees are usually dark themselves.

Step 11
Finally, use your softest pencil to draw in the completely dark “clouds” between the branches.

- DRAWING A WEEPING WILLOW
Step 1
We will draw according to the same scheme. Let's draw a general outline of the willow - something like a fountain.

Step 2
Draw the outline of the trunk.

Step 3
Draw the branches away from the trunk...

... descending with length.

Step 4
Draw the outlines of the “clouds”; this time they will look more like curtains.

Step 5
Fill in the trunk and branches with shading using a soft (2B) pencil.

Step 6
Darken the trunk and branches with the softest pencil.

Step 7
Take a soft (2B) pencil and draw ribbon-like lines along the “curtains”. They should form an arc at the very beginning.

Step 8
Darken the "curtains" with darker and wider curling lines in the spaces.

Step 9
Use your softest pencil to draw dark “curtains” on the other, darkened side of the tree. You can also add leaves to the branches to make them more detailed.

Your trees are ready!
As you can see, draw trees- an easy task; you just need to convey their appearance, not their definition. However, this is just the beginning of learning - if you want to become a real professional in drawing trees, take a notepad with you on your walk. Observe the trees you pass by and try to make quick sketches of them. This way you can develop intuitive drawing. If you prefer to stay at home, look at photos of trees on the Internet.
Translation of an article from design.tutsplus.com.
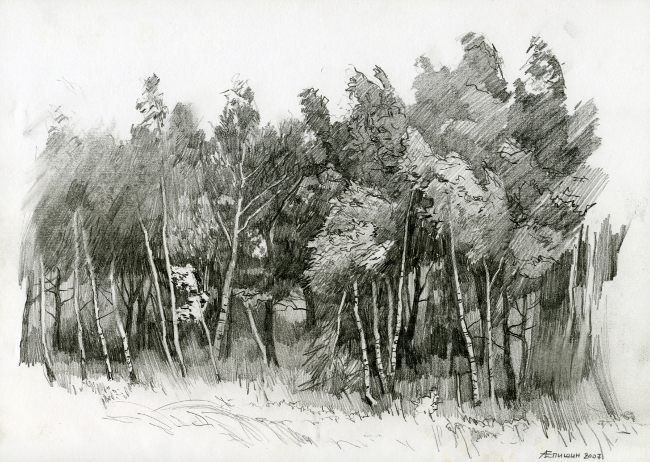
Nature is an eternal source of inspiration for creative people. Poets and prose writers, composers and artists dedicate their works to her. One of the most common landscape subjects is the forest. This is not surprising. It can be so different. Good and beautiful at any time of the year. What kind of flowers can you see in the crowns of trees!
Pencil painting
Every artist has his favorite materials for drawing, fortunately, now there are a huge number of their types. However, among the favorites is still the usual simple pencil.
Before starting work, the master needs to think about how to draw a forest with a pencil, since it is quite difficult to convey all the beauty of the landscape with just one color.
The difficulty may also lie in the fact that it is difficult for novice talents to convey the shadow.
To make the image more voluminous, it is necessary to apply it with strokes. It is better to make lines in different keys.
How to draw a forest with a pencil step by step?
When choosing this type of drawing, you first need to depict the general features. Straight curved lines appear first on paper. These are sketches of future trees and hills. After this you need to draw several thick trunks.
The next step is to place the bushes and grass.
When this is done, you should depict the trees that grow in the background.
If all the main objects are already placed on the canvas, then you need to think about the details. In how to draw a forest, it is very important that the picture is believable. To make the image look realistic, the artist uses shading. The stroke can be either horizontal or vertical. It is necessary to leave some areas of the image undarkened - those where the color falls. A similar effect can be achieved using an eraser.

Tree image
Trees are the main components of the picture. When thinking about how to draw a forest, you should learn how to draw trees. When drawing a sketch of each individual tree on paper, you need to consider some rules:
- the further away the object is, the more it will be enveloped in bluish fog, and the contours of the image will look fuzzy, as if blurry (one of the rules of aerial perspective);
- The closer the tree is to the master, the more saturated the color of its crown will be.
Choosing the right painting paper can help create a beautiful texture: watercolor paper can have rough edges. They will help create a beautiful look for the leaves and bark of the tree. To do this, you need to not press the pencil too hard when shading the surface.
In order for the image to look realistic, it is important to be able to work correctly with the foreground and background of the picture. For example, so that trees that are closer do not mix with those that grow a little further, they need to be painted with brighter colors.

Watercolor drawing
For those who prefer to paint with a brush, watercolors are perfect for painting.
When starting work, you need to sketch out the landscape. This is best done with a pencil. Draw the sketch with thin lines, otherwise a shadow may appear on the picture.
After the sketches are made, you need to start depicting the sky. Having chosen its location, you need to apply ultramarine and cobalt colors to it. In order for the line of clouds to be clearly visible, it is better to draw its edge with diluted burnt umber. A good option if carmine is added to it.
If the question arises about how to draw a forest especially expressively, then you should know that for this purpose more attention is paid to the foreground. The grass is drawn with jerky, sharp movements.
Leaves can be depicted in any color that your imagination suggests. The variation that uses a large number of different shades looks most advantageous.
When choosing how to draw a forest, it is important to choose a method that will bring as much pleasure as possible from creative work. Young artists should sometimes listen to advice on how to choose the right light, what time of day to paint, and how to create the right color scheme. But the main thing is unity with nature and creative impulse.

If the artist has a developed sense of harmony, how to draw a forest step by step fades into the background. Any manner of execution will only emphasize the beauty.
The forest can be very different. For example, it could be a small forest in which it is difficult to get lost, or it could be a deep thicket. To better understand how to draw a forest, it is recommended to carefully consider the works of the greatest painters on this topic. For example, the paintings of Shishkin are very interesting, who was unusually good at conveying the atmosphere of a mysterious and enchanting forest in his wonderful works.
You can also draw a forest with a pencil from life. Such a walk, during which you can make a series of sketches from nature, will also be very beneficial for your health. After all, it’s no secret that the air in the forest is particularly clean and fresh. If it is impossible to go to some forest, then you can learn how to draw a forest using beautiful photographs.
Before you draw the forest step by step, you must make sure that all the accessories needed for this, which are listed just below, are nearby. So, to draw a forest you need: 
1). Multi-colored pencils;
2). Eraser;
3). Liner;
4). Paper;
5). Pencil.
Now you can learn how to draw a forest with a pencil step by step, and then color it:
1. First draw the horizon line;

2. Draw the outlines of the tree trunks that are located in the foreground;

3. The drawing will look more interesting if the trees are different. Therefore, draw the first tree, making it a Christmas tree;

4. Draw the second tree, which half hides the spruce. Let it be a birch;

5. Now draw more clearly the third tree, which is the largest. Let it be an oak tree;

6. In the background, draw the trunks of other trees, without detailing them too much;

7. Draw blades of grass and mushrooms in the foreground;

8. Outline the sketch with a liner;

9. Use an eraser to erase the preliminary pencil drawing;

10. Paint the trunks of those trees that are not birches with different shades of brown. Paint the cones on the spruce with a light brown tone;

11. Shade the birch trunks with light gray and gray pencils;

12. Blue-green color
In this lesson we will look at how to draw a forest, how to learn to draw a forest realistically with a pencil step by step step by step, an easier forest drawing lesson is located.
In this tutorial we will focus on:
1. Texture, which is created with various tools and shading techniques, showing the details of the surface of trees and vegetation on the ground.
2. Geometric perspective, i.e. The closer the trees are, the larger they are; the further away, the smaller. Also, when moving trees away from the foreground deeper into the forest, the bases of the trees are located higher than the previous ones.
3. Atmospheric (or aerial) perspective, which is conveyed by depicting the influence of atmospheric components, for example, tiny particles of dust, pollen or drops of moisture. Trees in the foreground are more detailed, with brighter highlights and darker shadows than trees further away from the viewer. Distant trees are lighter, have less contrast and less detail due to the presence of more atmospheric components between them and the viewer.
Used 2H, HB, 2B, 4B and 6B pencils (best if you have all pencils from 6H to 8B), vinyl eraser and smudge, heavily textured watercolor paper (cold pressed, 90 lb).
Composition planning.
In the picture, the depth of the forest is created by 14 trees. In the forest, all these trees are approximately the same, but according to the rules of perspective, they will have different thicknesses in the drawing. Compare the following two illustrations to get a better understanding of the process behind this drawing. To help you identify which trees are closest to you, each one is labeled with a number to help you avoid confusion.
The closest tree to us is tree No. 1, the farthest tree is 14. You can notice that the closer the tree is, the darker it is drawn, the further it becomes lighter.
Trees that are closer to us will be more detailed, their highlights will be brighter, and their shadows will be darker.
The light source is located at the right rear. On the left, the trunks of each tree are shaded slightly darker than in other areas, because the light falls from the back right, then the darkest areas will be on the opposite side, i.e. front left.

The location of trees in the forest in the picture.
Before you begin shading, you should draw the outlines of all 14 trees, also remember to place the base of each tree a little higher as the tree numbers increase. In addition, the trees should gradually become smaller while their ordinal number increases.
1. Using thin lines, outline the area for the drawing with approximately the same proportions as mine.
My drawing is 4 x 6.5 inches (about 10 x 16.5 cm). Other options may be 6 by 9.75 inches (approx. 15 by 25 cm) or 8 by 13 inches (approx. 20 by 33 cm).
2. Draw the outlines of the three trees that are closest to us.
Tree No. 1, the largest tree, is the focal point of this drawing. Notice that its location is located to the right of the center of your drawing area. Its base is located below all, close to the bottom edge of the picture.
The sketch of Tree 2, the second largest tree, is moved closer to the left edge of the drawing and is smaller in size than the first tree. Its base is located slightly higher than that of tree 1.
Tree 3, the third largest of the trees, is on the right side of the picture. Its base is slightly higher than that of tree 2.

3. Draw trees numbered 4, 5 and 6. Trees that are located in the foreground sometimes coincide with the trees behind them, giving the effect that one tree is located in front of another. Notice how tree 4 appears to be in front of tree 6. Also, trees become smaller the further away they are from you. Conversely, the closer they are to you, the larger they appear.
Tree 4 is not as big as 1, 2 or 3 and its base is also located in the picture above.
The sketch of the 5th tree is located slightly to the left of the 3rd.
Tree 6 is located slightly behind tree 4 (covered by its trunk), so you just need to draw its right side and base.

4. Draw trees 7, 8 and 9. Tree 7 is located slightly to the left of the 1st. Tree 8 is located to the left of tree 7 (and there is space between them). The base of tree 9 is located higher than the base of tree 8, and the sketch of its trunk is shown with a single vertical line to create the illusion that the tree is located behind tree 7.

5. Draw trees from 10 to 14. Do not forget that each subsequent tree is drawn a little higher than the previous one and becomes smaller than the previous one. Now compare your drawing with my drawing and make any changes you want. Check the location of the bases of all fourteen trees, starting with tree number 1 (the largest tree) and sequentially through all numbers until tree number 14 (the smallest tree). Make sure that each base is drawn slightly higher than the previous one.
Creating a variety of textures.
This section of the tutorial is dedicated to creating different textures.
The "teeth" of heavily textured watercolor paper (referring to the paper's surface features) can help create texture for trees and foliage. When you shade, hold your pencil sideways and use gentle circular motions.
Don't press too hard on the pencil! The excellent texture of this paper can be easily smoothed out, i.e. destroyed by this pressure, and on a smooth surface you will no longer get the desired imitation of, for example, tree bark).
Be sure to leave areas of white paper between the trees and on the illuminated sides of the trees.


Below is a scale of gradations of shadow shades depending on the softness of the pencil. well if you have the whole set, this table will help you choose the right shade ratio. This lesson also uses shading with curls, see the lesson on it (the farther apart the curls are from each other and the harder the pencil, the lighter the area, the denser and soft the pencil, the darker the area you get). Note the wide range of light and shadow ratios used to convey the texture of the vegetation on the ground.

Adding textures and depth to the forest.
Here we will create a 3D forest space using shading.
6. Shade the areas behind the smaller trees, creating a smooth transition from white at the top to darker shades down towards the base.
7. Add shadows to trees 11, 12, 13 and 14.

8. Add shadows to trees 6, 7, 8, 9 and 10. See the next three pictures. Don’t forget that each tree on the left is darker and the lower the tree’s serial number, the darker the shadows need to be made.
9. The texture of the vegetation on the ground, which is located far away, is drawn using a combination of regular shading and swirl shading. Also add some dark shadows to the bases of the trees.


10. Darken all the trees except the first one, use pencils that suit you best and add, checking the original:
- more textured shading on the base of the trees, which will look like vegetation in this place;
— enhance the contrast on tree trunks;
- draw a few small branches (growing downwards) at the top of some of the trees in the background and background of the picture.


